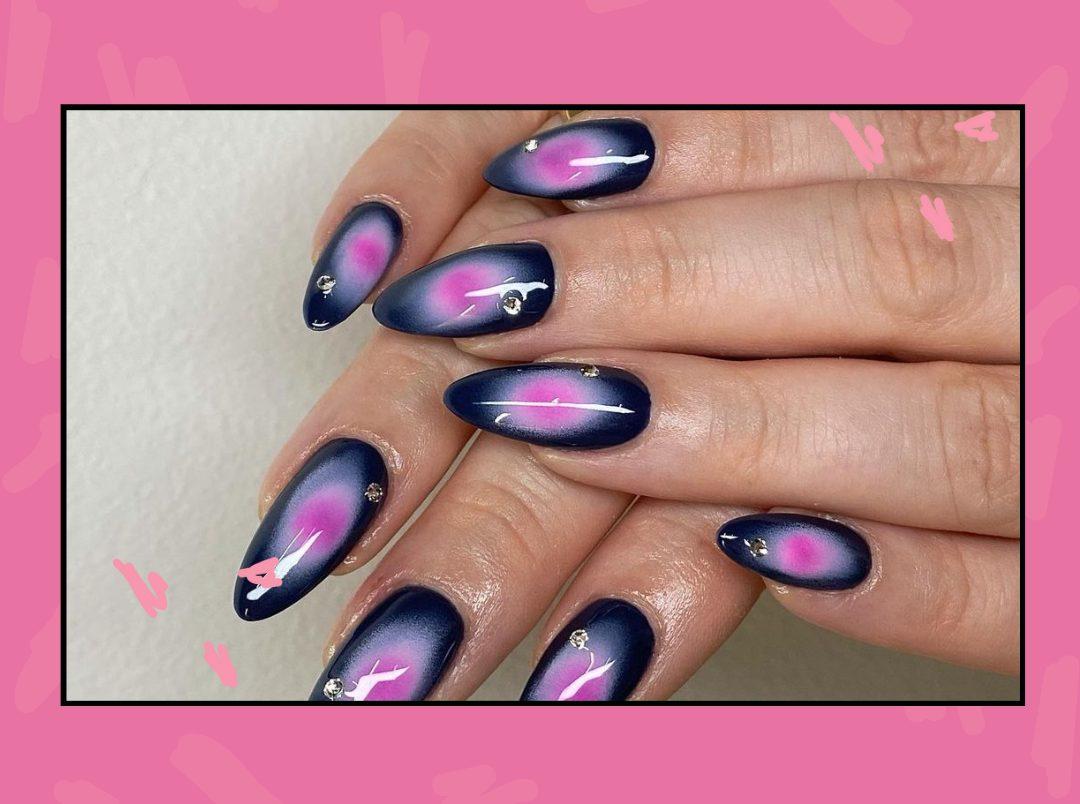
The prettiest nail-art trend has now become even more accessible. No more reserved for Doja Cat and A-listers alike, ‘aura nails’ have recently positioned themselves as DIY-friendly, and it’s all thanks to a twenty-second tutorial doing the rounds on the ‘gram. This nail-art trend is characterised by a diffused, halo-like ring of colour that embosses the centre of the lacquer gloriously. It’s intended to mimic the appearance of an ‘aura’ — like, you know, the energy emitted by someone. While you cannot see an aura, it’s usually represented by a halo of light and energy surrounding a person, and this trend mirrors that aesthetic on the nails.
The reel has amassed over a 132,000 views on the app, and justifiably so. If you’re looking to tap into the artiste in you before the year ends, this one’s the way to go. Here’s a step-by-step breakdown of the aesthetic along with all the products you’ll need to assemble to achieve black-pink aura nails
How To Recreate The Celeb-Approved Aura Nails Easily
What You’ll Need
- A clear base-coat
- A black nail-polish
- A pink nail-polish
- A sponge
- A clear top-coat
- A polish-barrier
Step One
So how do you do aura nails? Begin by trimming and filing your nails to a shape and length of your preference. Coat the nails in an all-clear base coat. This formula by MyGlamm is vegan and cruelty-free, and is endowed with long-stay, chip-resistant abilities. Just swipe it on, and you’ve laid the groundwork for the manicure already.
Step Two
The second step involves drenching the skin around the nail in polish barrier to prevent staining and smudging. You can peel off the dried-up formula once you’re done. This one’s the finest in the market at the moment.
Step Three
Begin by lacquering the nails in a jet-black formula. This one by Miniso is endowed with the deepest shade of black, and it drenches your nails in the colour in one swipe.
Step Four
Now — onto creating the ‘aura’. You’ll need a sponge for this stage. Dab a light shade of pink onto the centre of the sponge before proceeding to surround the ring of colour with black. Ensure that this ring is thick and visible for the effect to translate onto the nails. Gulaab-ish by Lovechild Masaba is a high-spirited, playful bubblegum pink that’s almost exactly like the one enlisted in the tutorial. Trust us.
Step Five
Stamp the coloured part of the sponge onto the centre of the nail a couple of times until the design starts resembling an ‘aura’. Apply the sponge on the nail right after colouring it, or the polish will dry and the transfer won’t work as well.
Step Six
All that’s left to do is conclude with an all-clear top coat. Seal The Deal truly lives up to its name, and the best part is that it’s long-stay, cruelty-free, and vegan.
That’s it! What do we think of this nail art trend?
Featured Image: Instagram


.jpg)


