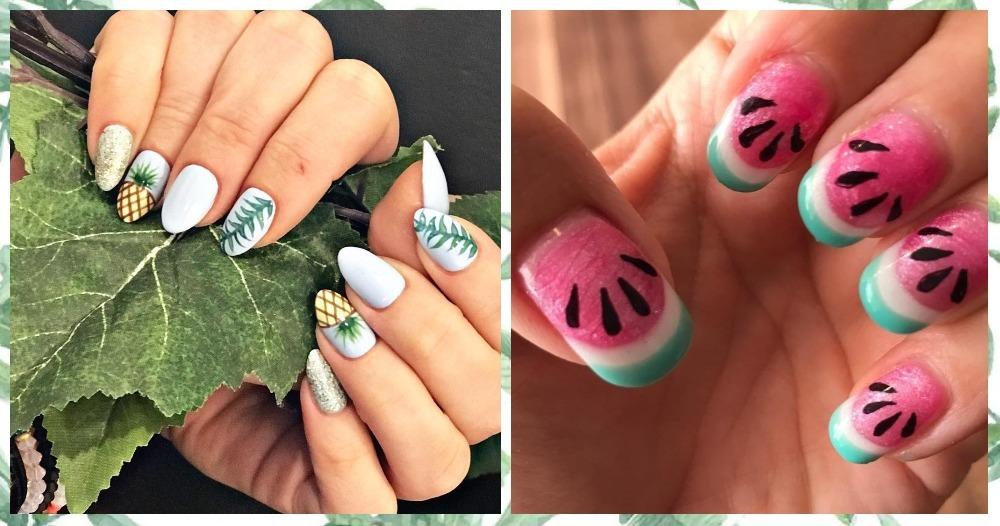
Do you spend a lot of time double-tapping and saving #NailInspo on Instagram for your next appointment at the nail salon? We feel ya, sister!
Admit it, you do feel powerful typing with long and pretty nails. I, for one, love to keep my nails up-to-date with regular nail appointments. But regular extensions have left my nails brittle and weak. That was my cue to let my nails breathe a little and do some DIY instead!
DIYs are fun, much more affordable, easy and I can totally jazz up my nails in my PJs. I can do quick nail art or go completely crazy by hoarding elements. My nails, my choice, right? And if I am not happy with my design, acetone is all it takes for a do-over!
PS: You know what time is it? It’s nail o'clock!
Believe it or not, creating magic on your nails with bottles of polishes and other elements is not as difficult as it might look. Sometimes, just adding a simple touch of glitter or rhinestones can do the trick for you. But first, let’s prepare those nails:
- Remove the old nail polish from your nails (if any), wash your hands and pat them dry using a hand towel. Washing your hands will make the cuticles soft, making it easier to trim them.
- Next, use a nail cream (or a nail & hand cream) on your nails and massage in a circular motion. It strengthens the nails, makes them soft so the nail polish glides on beautifully.
- Use a cuticle trimmer to remove the dead skin around your nails. Make sure you’re gentle otherwise the sharp blade might cut you and leave you with infected nails and fingers.
- Brush off the dead skin from your hands and apply the nail cream again.
Now that your nails are all prepped up, let’s get artsy!
Before starting out, here are a few things you should keep handy - different shades of nail polishes, nail polish remover/acetone, some loose glitter, lots of cotton balls, hand towel, nail & hand cream, nail cutter, earbuds, sponges, nail stickers, tape, eyeliner (yes, an eyeliner), cuticle trimmer, a nail filer and of course, your inspiration!
Here are a few products I recommend:
How do you wish to ‘nail it’ today? Thinking about going full glam or keeping it simple?
If you’re a beginner, you can start with something as simple as experimenting with shades you haven’t played with before. Deeper hues like black, grey, merlot or bronze work well in winters and pastels are a hit during summertime.
Nail maestro, Betina Goldstein’s Instagram is filled with #NailInspos that’ll make the laziest of souls experiment with their nails. Here, she chose the perfect shades for autumn and those rusty tones are givin’ the perfect pre-winter feels! Grade up the shade on each nail and you have a simple yet stunning nail art design.
Or if you’re not yet ready to bid adieu to summers just yet, add a pop of colour to your nails with these bright colours.
Add a zing of drama to your nails with this one-of-a-kind nail art. Paint your nails with two coats of your favourite nail polish and let them dry. You can then either add multiple coats of glitter or stick on some rhinestones or small stickers for an instant touch of glam.
Easy, effortless and oh-so-pretty!
Don't you just lave(ender) this one?
You'll need eyeliner or a mani marker pen to create the eye outline on your nail with a precise black tip for this design. Once that dries, carefully fill it in with nail polish. Next, use the nib cover of a pen, dip it in white nail paint and gently dab it on your nails. For the final touch, make a black dot as the innermost circle using the tip of your eyeliner.
Would you believe me if I told you that you can totally achieve this nail art in a matter of minutes? Use a striking colour to paint four of your fingers. Use a neutral colour on the remaining nail. To make things wild, add small dots of polish on your nail. Using an eyeliner, make incomplete borders of the dots and that’s it!
Scotch tape can give you salon-approved nails within minutes! Just stick your scotch tape on the part you do not want any colour, you can even cut it in a curve before sticking. Paint the rest of your nail and peel off the tape after the polish has dried.
This is *gold*, right?
And if you’re willing to add two or more colours to your nails, you should totally try this nail art at home!
Be the talk of the town this Christmas with these nails! Festive yet subtle, right?
One of the simplest ways to upgrade a boring nail paint is to dab it out with a sponge! Take a sponge (it could also be the sponge that’s used to wash the dishes), apply stripes of nail polish on it and press it hard on your nail. And voila, your perfect ombre nails are ready to be shown off.
Try these fun, rainbow-themed nails by using bright colours of the rainbow!
You know those small, round covers on the tip of your new pen’s nib (known as nib covers) are excellent for impromptu nail art. Just apply two coats of any nail polish on your nails, pour some nail polish on a foundation tray, dip the nip and get dotty!
This is perfect for every occasion. Be it a cocktail party or even a wedding!
Nail art is all about experimenting and being creative. But here are a few things you should keep in mind:
1. If you have short nails, you can always go for temporary nail extensions and DIY the hell out of it or simply get a gel manicure and use your creativity to further enhance your design.
2. Play with different nail shapes - oval, almond, square, etc. Don't just settle for one shape.
3. Use a tea bag to mend your broken nail. Cut a tea bag and remove all of its contents. Using nail glue, cut out a small patch of the tea bag and stick it on your broken nail. File it till it becomes fine and blends well with the nail. Use a top coat to seal it properly and apply two coats of nail polish - that's it!
4. When using a sponge to create an ombre effect, outline your nails with glue and peel it off after your ombre art! Pretty nails with no fuss!
5. If you do not have a nib cover handy, use a bobby pin to create polka dots on your nails.
6. If you're dressing up your nails at the last minute, take a bowl of cold water with ice and dip your artwork to speed up the drying process.
7. Don’t forget to seal your artwork with two coats of topcoat!
Featured Image: Instagram
POPxo is now available in six languages: English, Hindi, Tamil, Telugu, Marathi and Bangla.